Art Work
textured Tripod mug
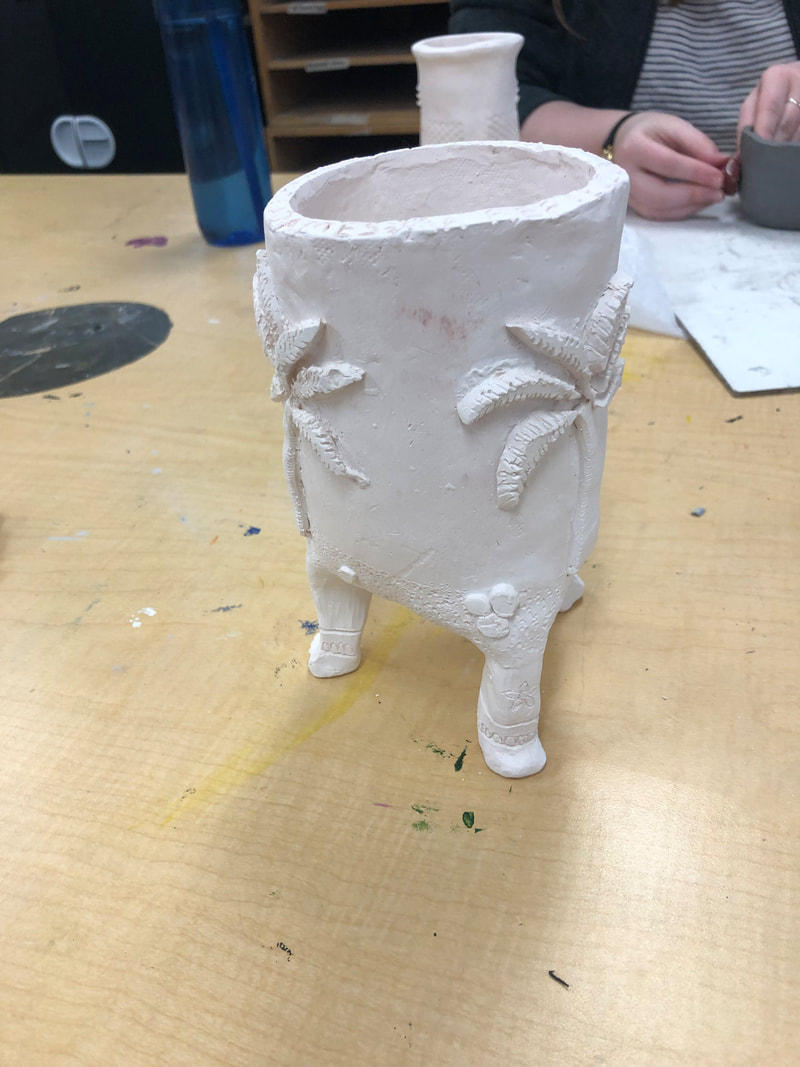

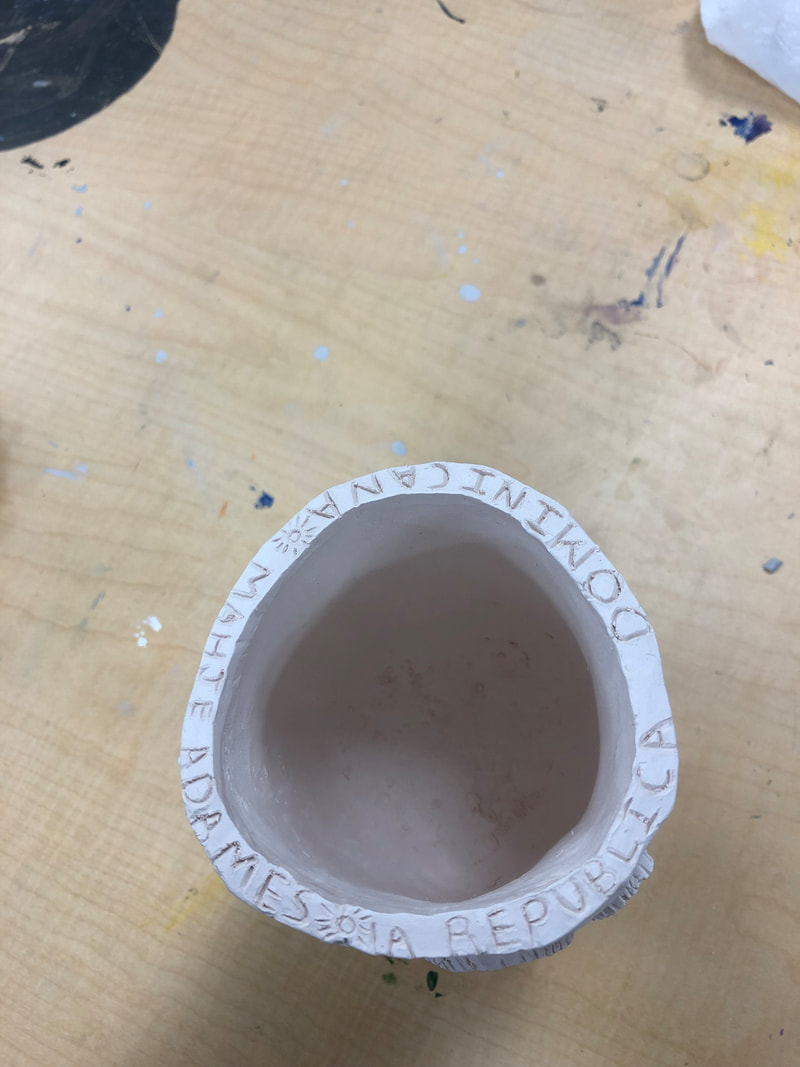
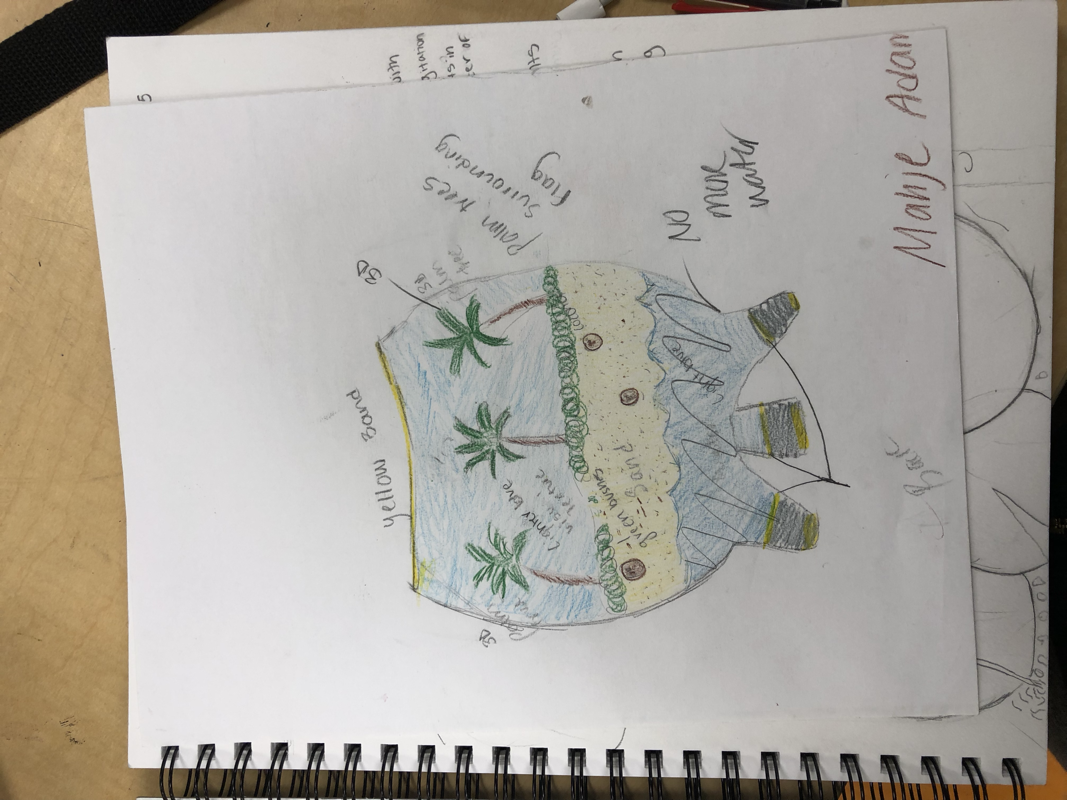
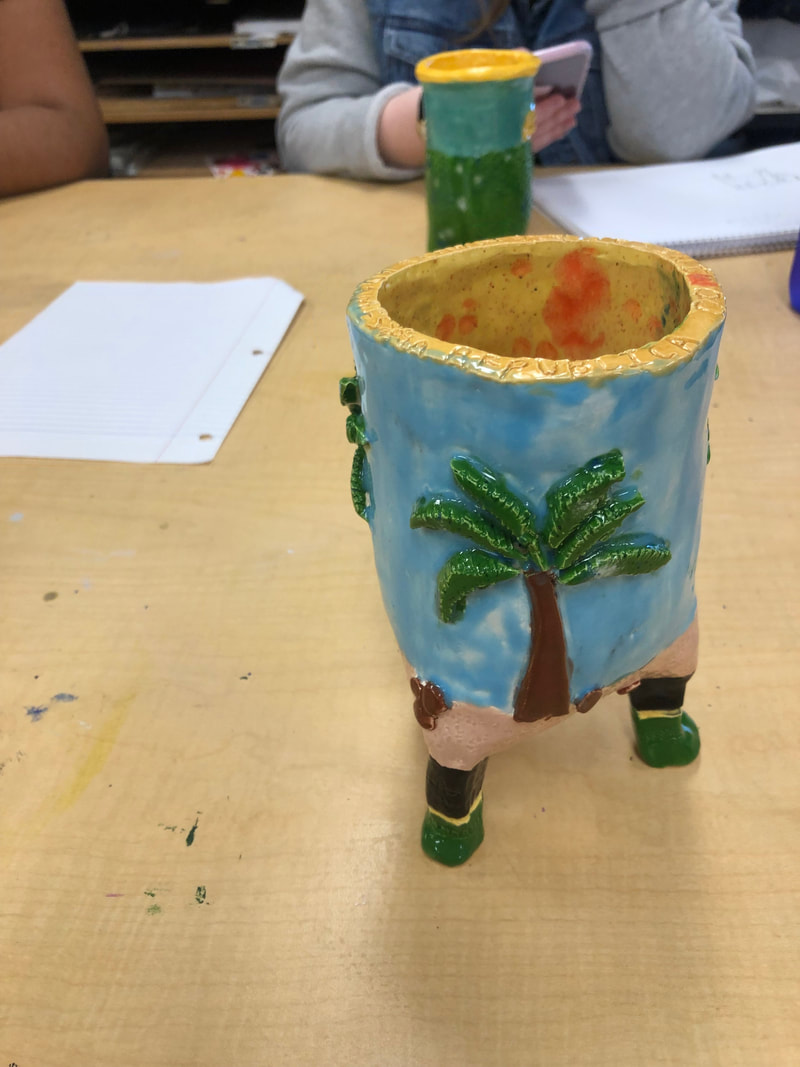
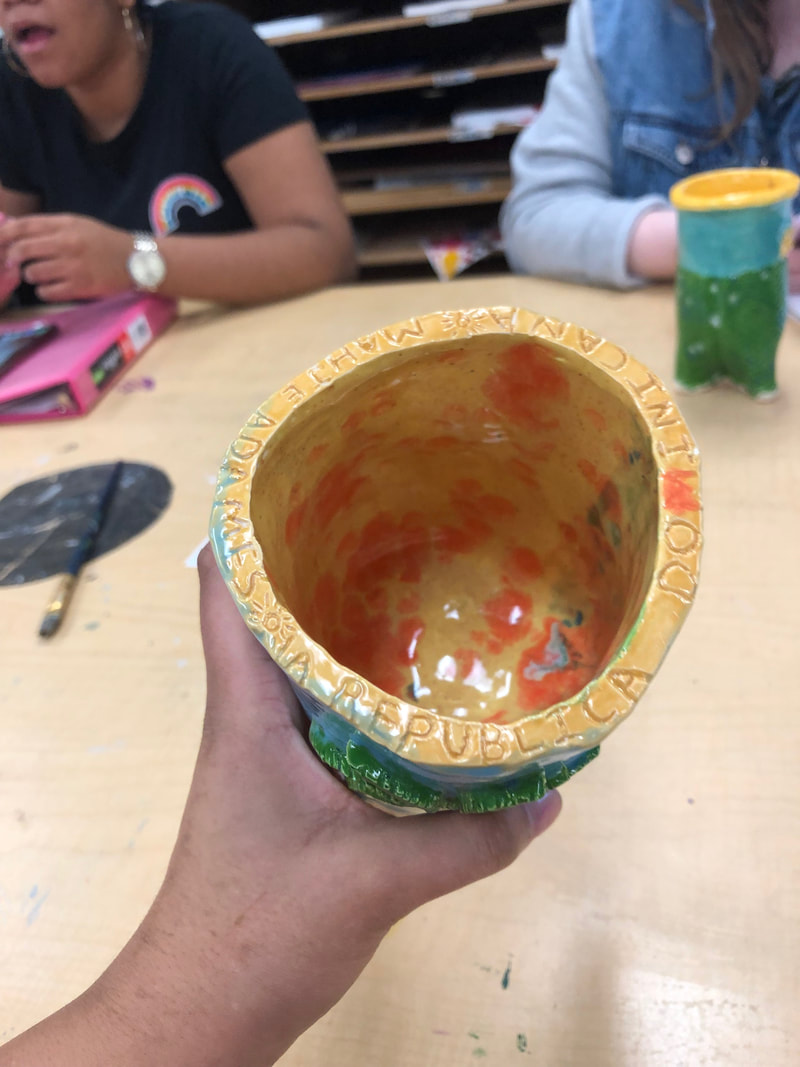
I started with a sketch, which I didn't follow. the sketch was a more rounded bellied mug with short legs, bushes, and water on the bottom, but I decided to change it to a taller, longer legged mug without the water. I made the palm trees and coconuts 3D. I used a pencil to make the sand more realistic and used a needle tool to carve the letters, flowers, and other patterns in the mug. I picked the yellow color on the inside to represent a bright, fun and sunny look. I think it looks very beautiful and the colors really pop. I didn't do a handle because I felt that the legs were to long for a handle to make sense. some things I felt went great were the legs, the colors and the carving. if I could do this again I would change the height of the mug, and I would also make it fatter.
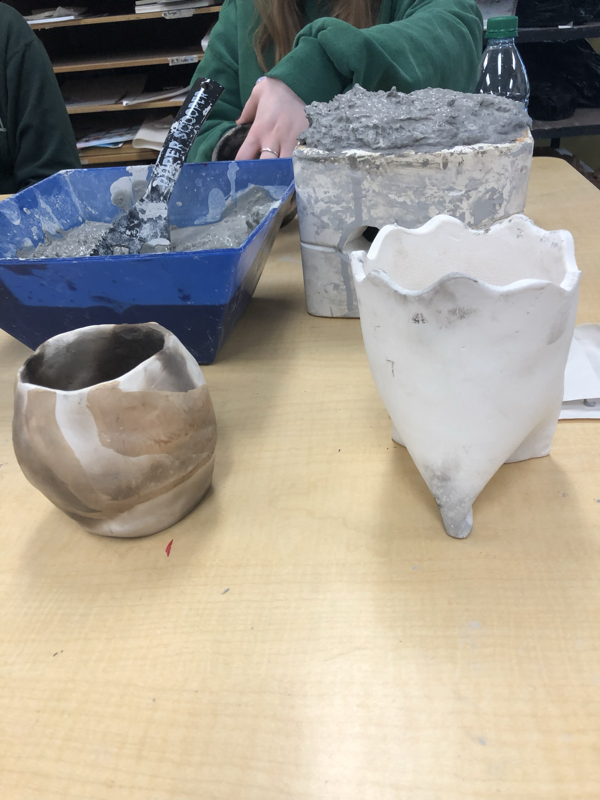
Clay slab: when a slab is rolled out, and the pressure thins out the clay. also a broad thick piece of clay
Clay slab: when a slab is rolled out, and the pressure thins out the clay. also a broad thick piece of clay
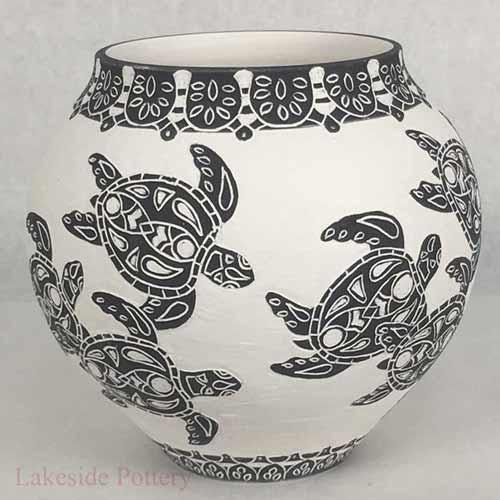
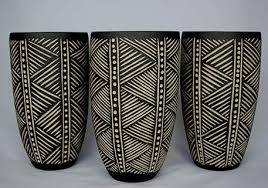
INspired artist POst
|
|
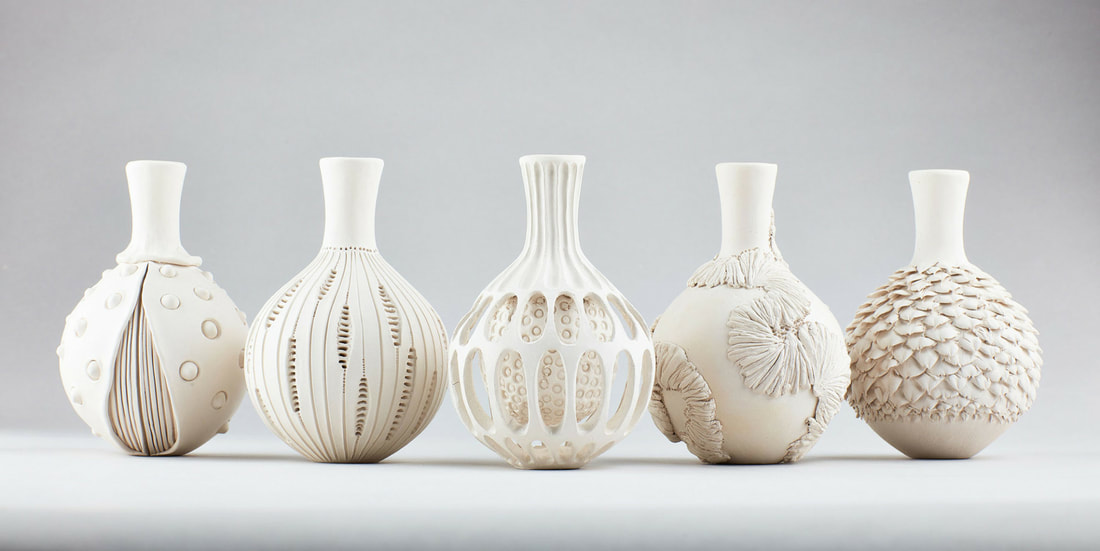
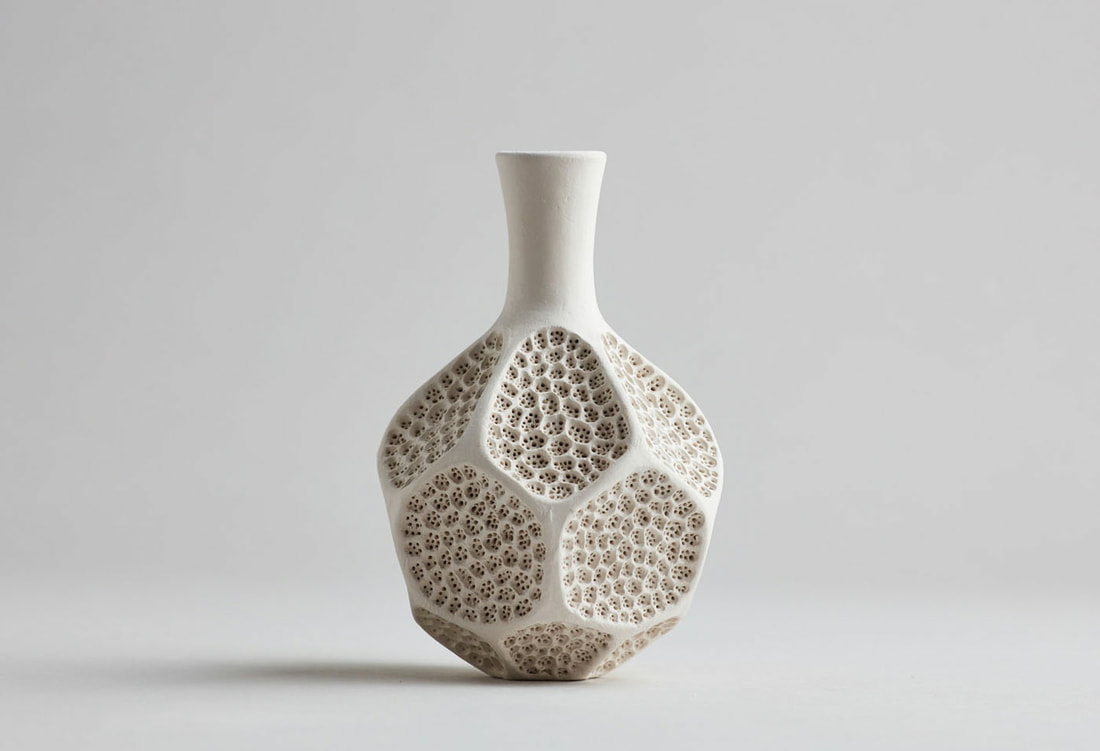
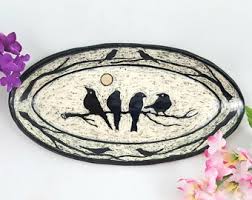
My inspired artist is Anna Whitehouse she lives in the U.K. She used clay to make these pots. her websites are...
https://www.anna-whitehouse.co.uk/ https://www.instagram.com/annawhitehouseceramics/ Anna's work is inspiring to me because it is so unique. The textures and details she put into the work are very beautiful and definitely paid off. |
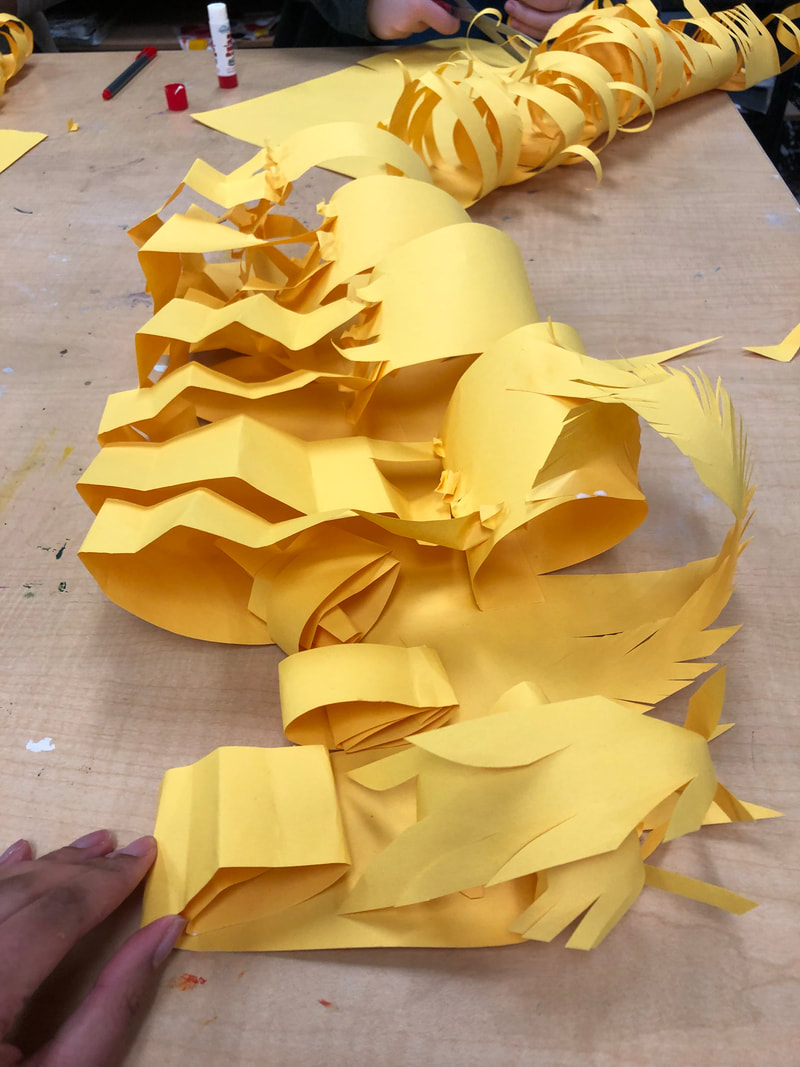
1 day paper project
|
|
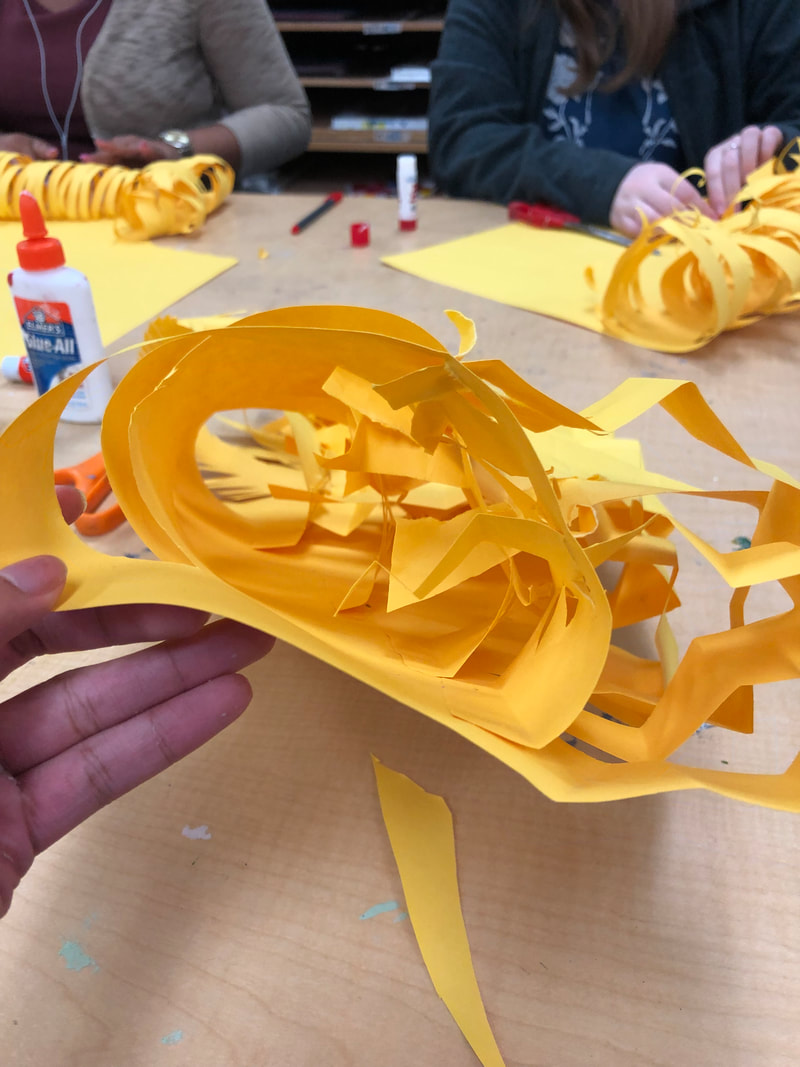
what I found difficult about making the sculpture was my idea actually going through. What I found successful was ripping, cutting and designing the paper. yes I constantly cut strips of paper and crinkled them or curled them. I also glued most of the pieces in a tunnel form.
|


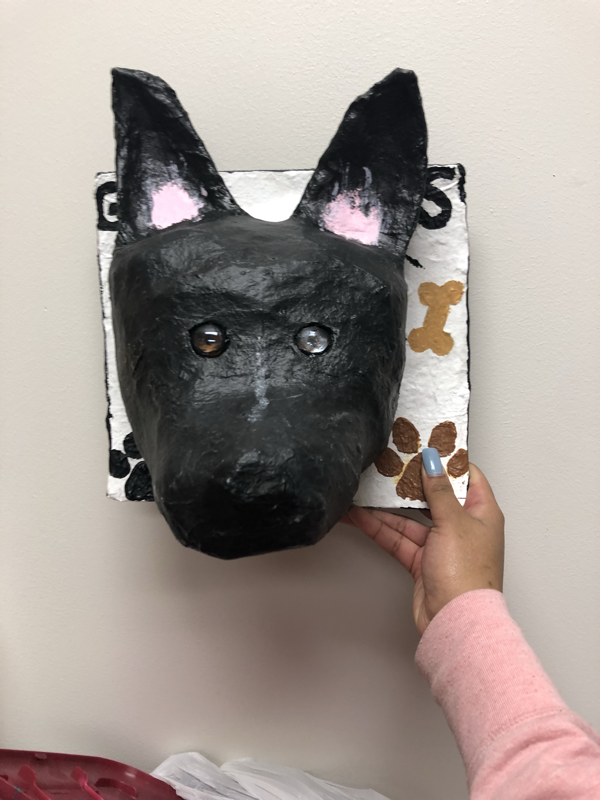
PAper Mache
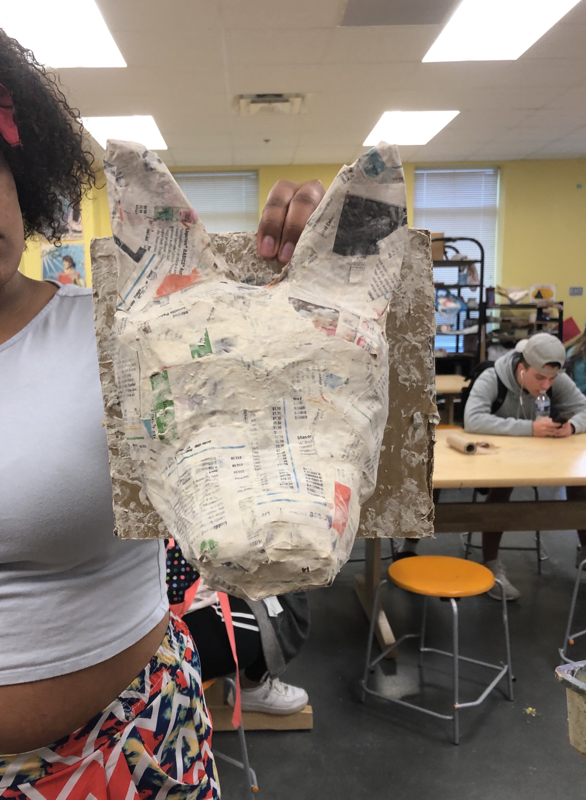

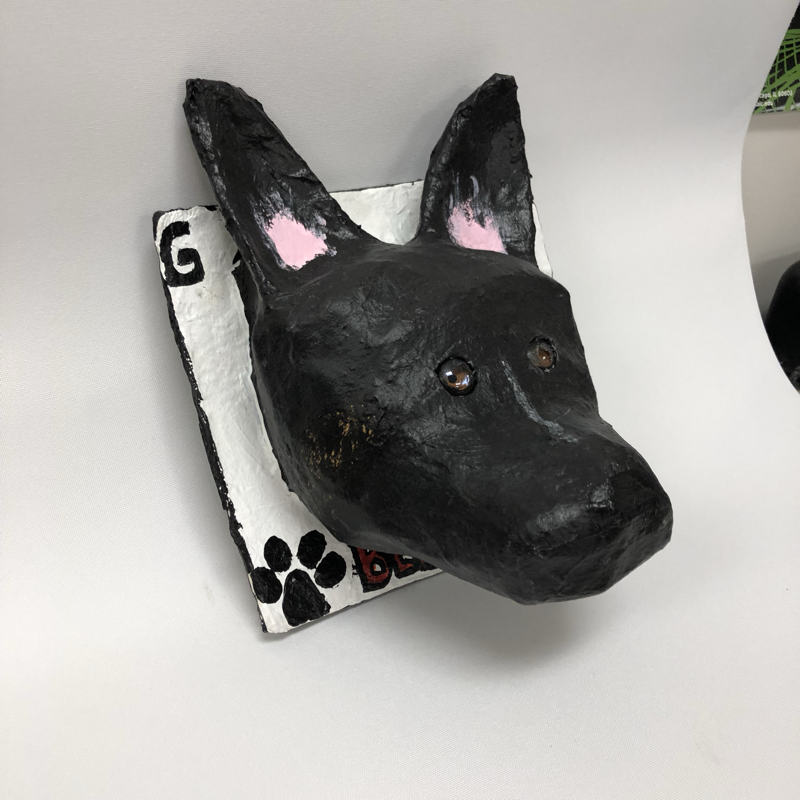
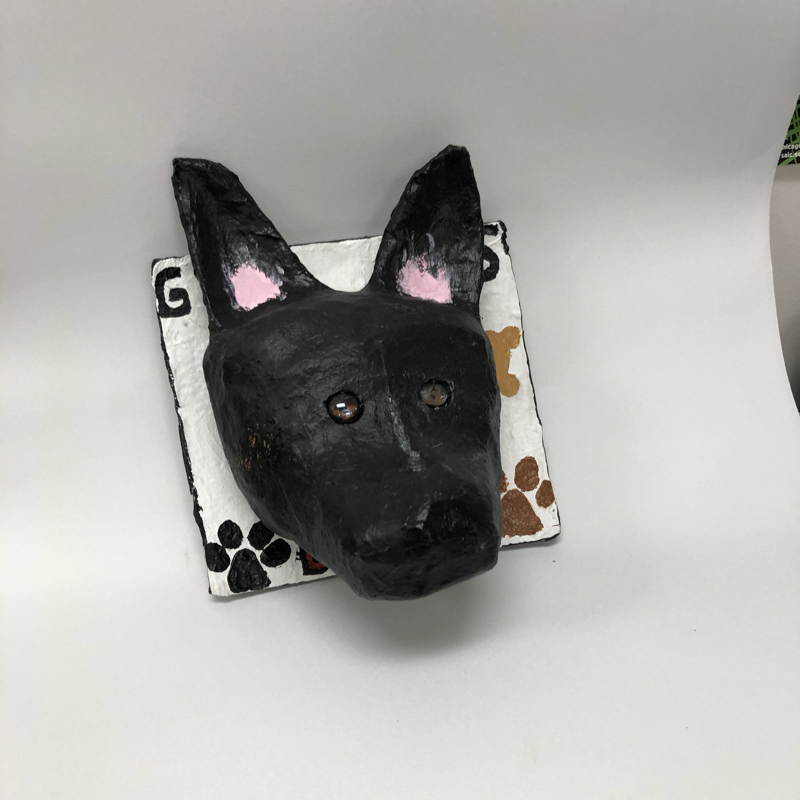
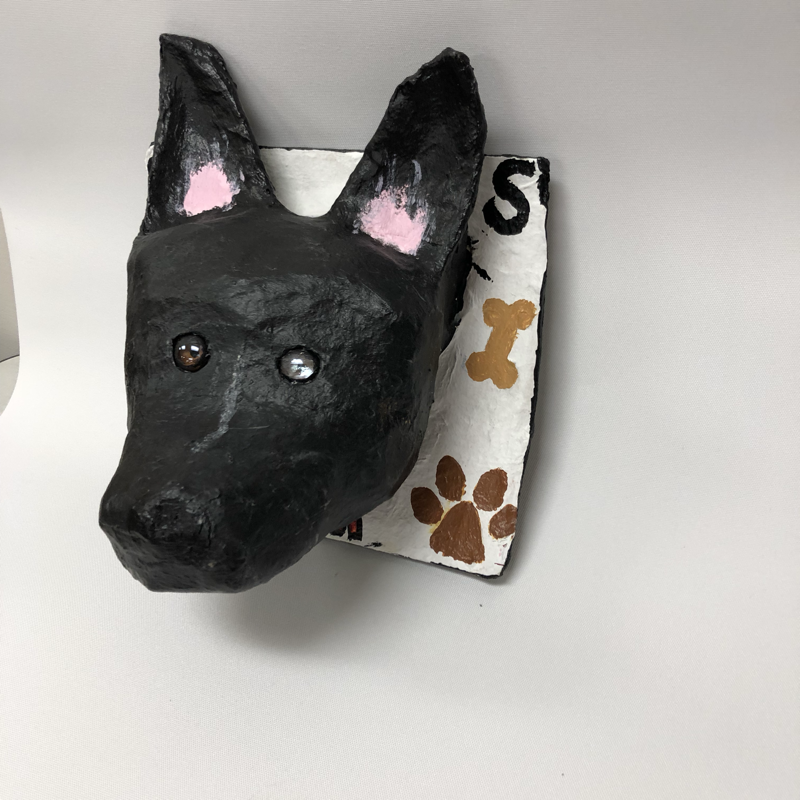
- I first had to build the shape of the head of the dog with paper in plastic bags. I then got tape to make it a more definite shape and make parts smaller, like the snout, and leave parts bigger, like the head, I used cardboard to make the ears, and a cardboard background for the head to sit on. i then mixed flour and water and applied paper with this mixture to the piece until i had a hard cover over everything. I then did the same with viva paper towels. I used a black base, and added some colors to her face. i used a matte finish on her head and used a glaze for the nose. i used marbles for the eyes, which i colored the back of before poping them in.
- my piece was mostly successful in the shape of the head itself. i would have preferred a smaller snout, but i couldn't realize that until i had already applied the paper mache. It was also successful in the eyes and the paint colors.
- I had difficulties figuring out how to shape the plastic bags with paper to make a dog head. I had to look at a lot of pictures to finally get it to this point. Everything after the shaping was smoothing sailing for me.
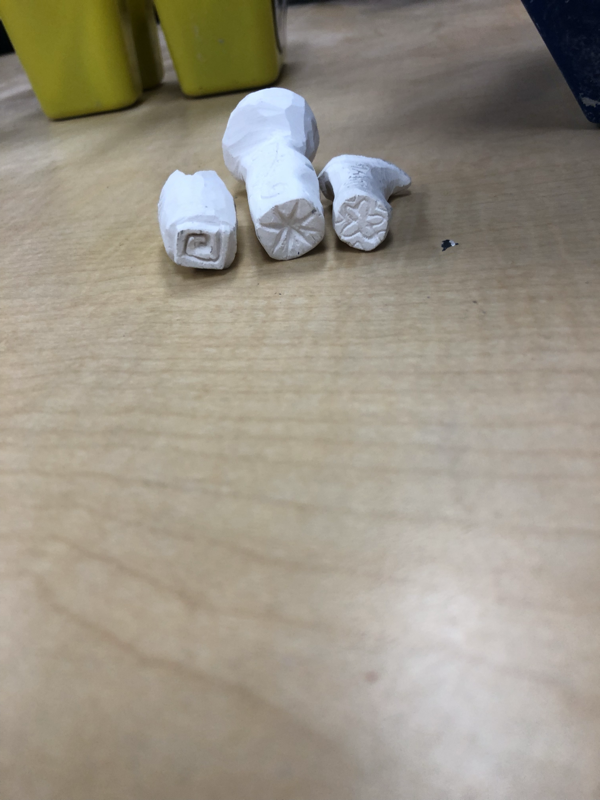
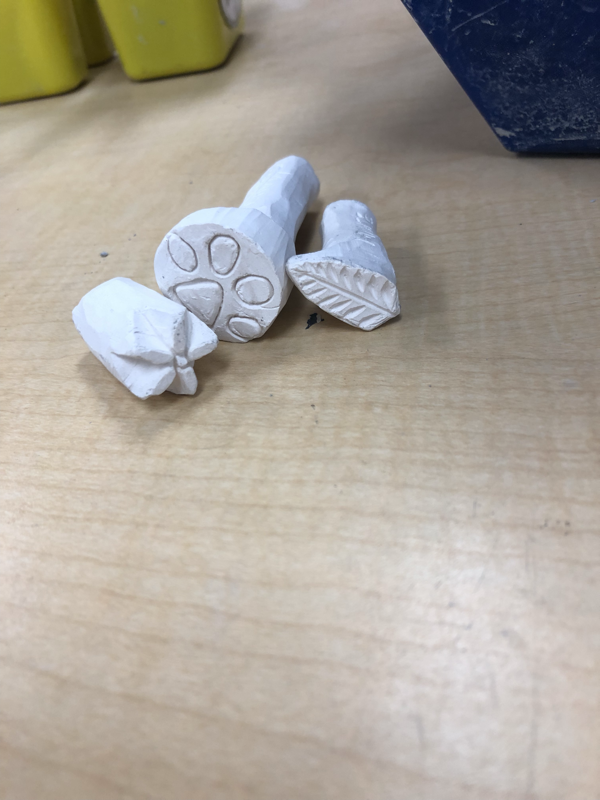
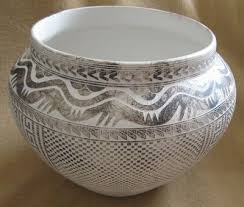
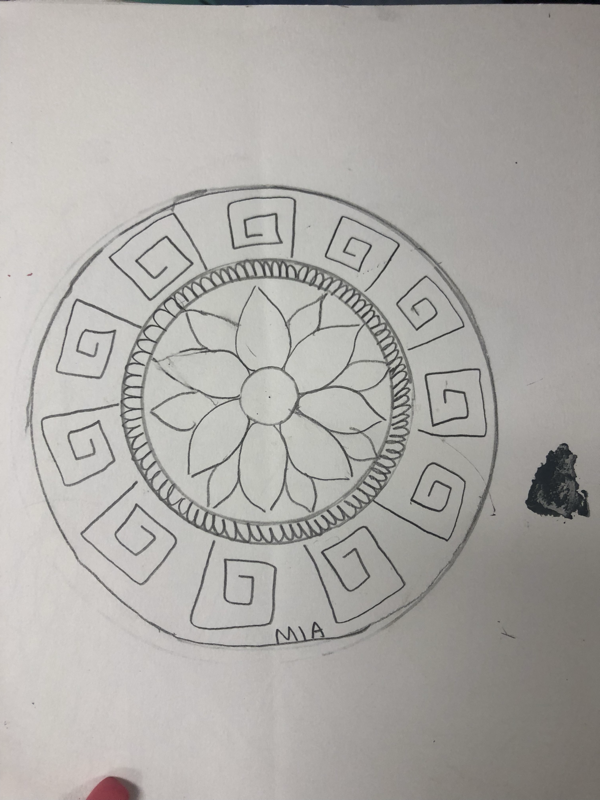
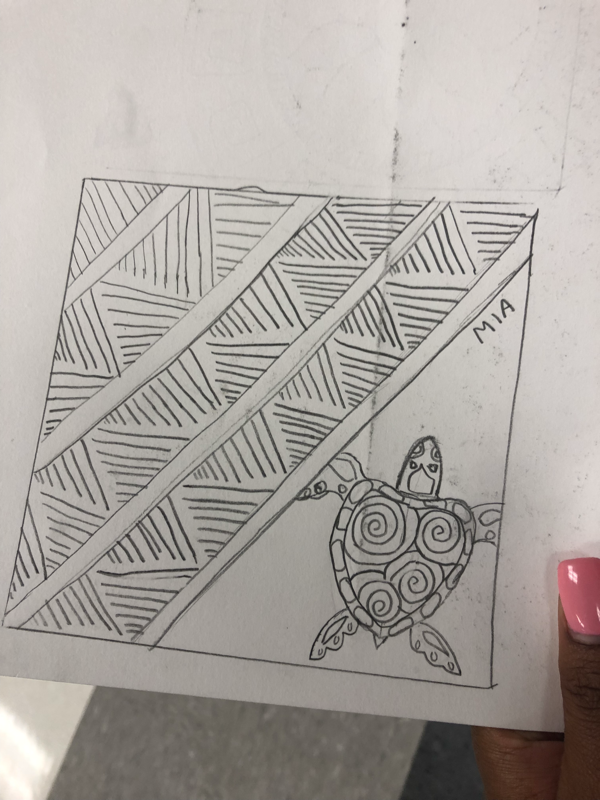
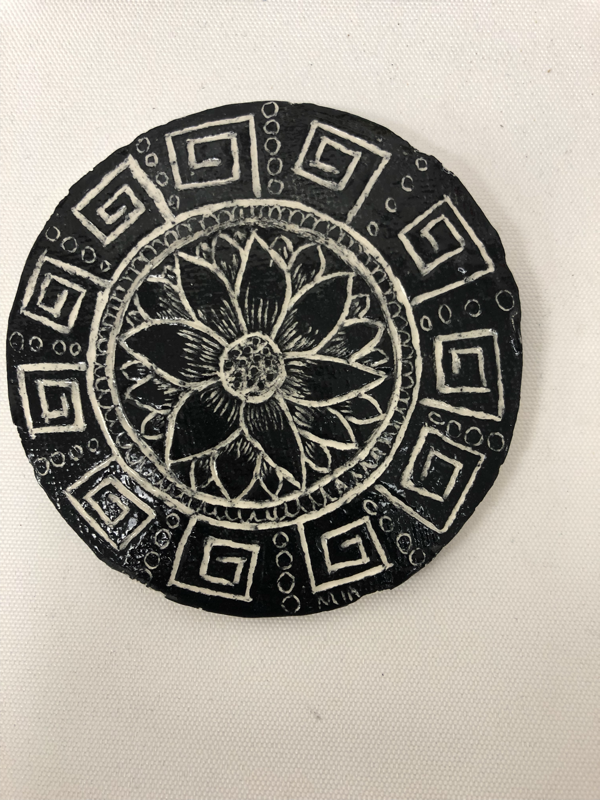
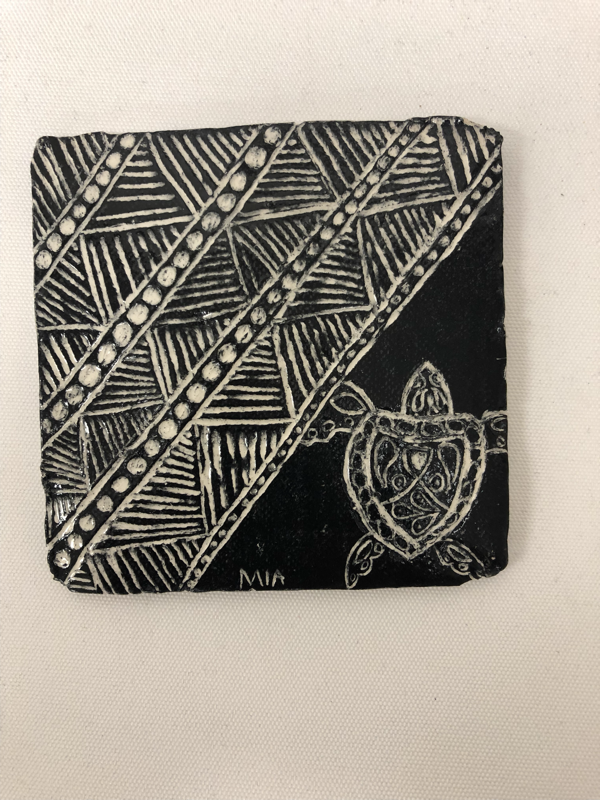
Clay stamps
|
|
|
pitfire
|
|
|
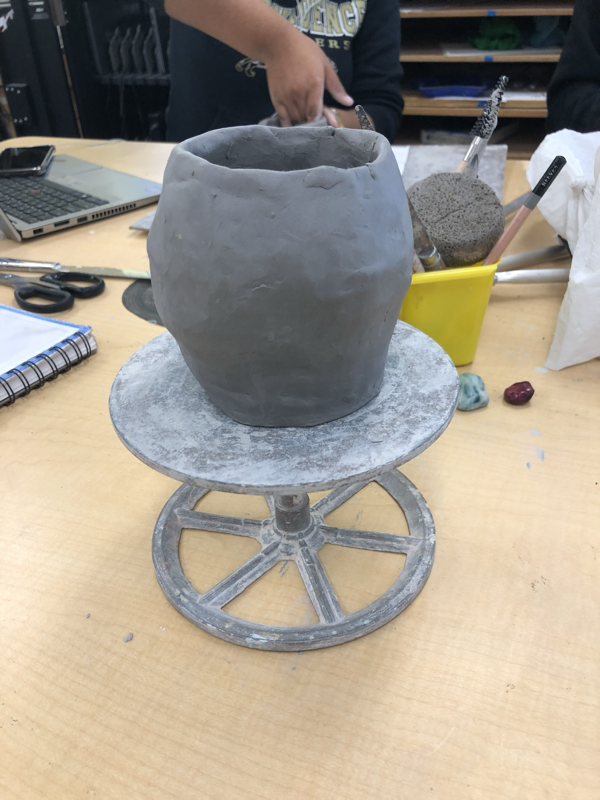
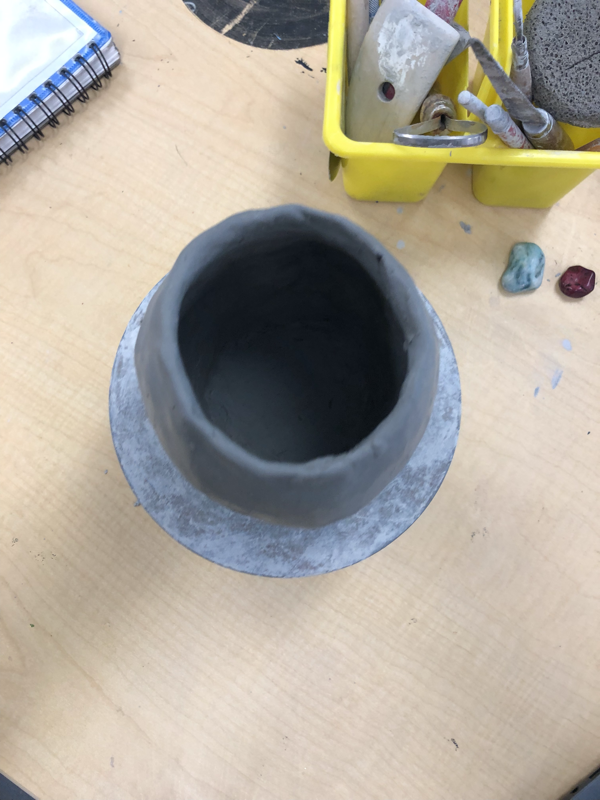
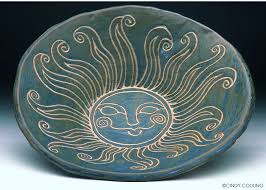
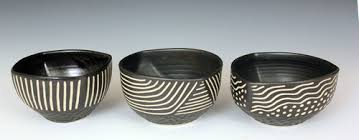
tray set
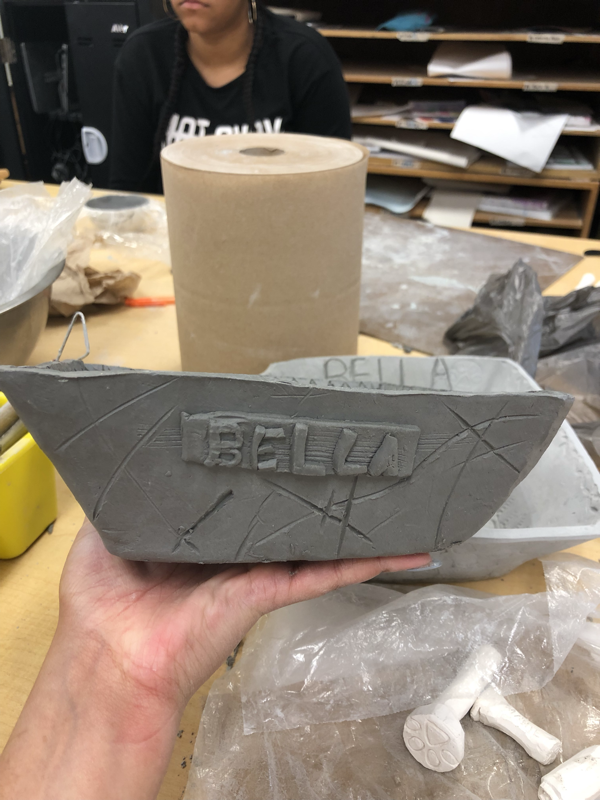
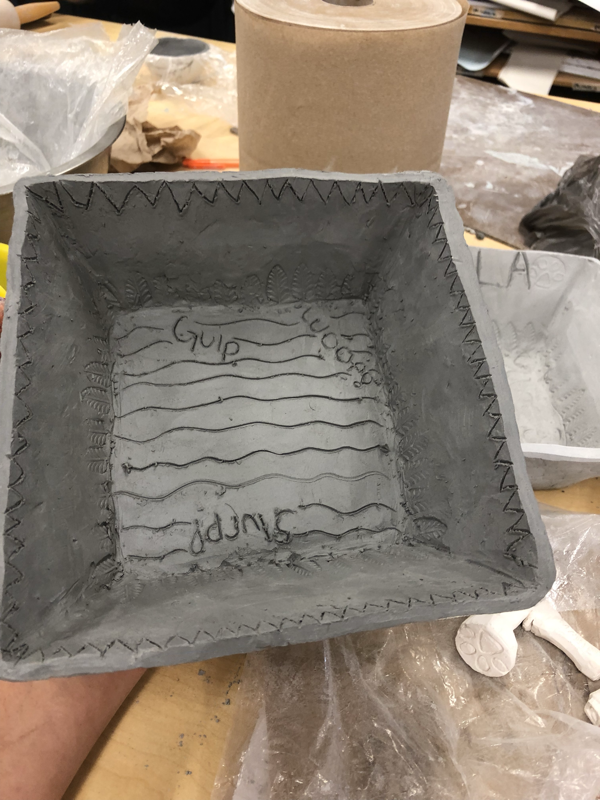
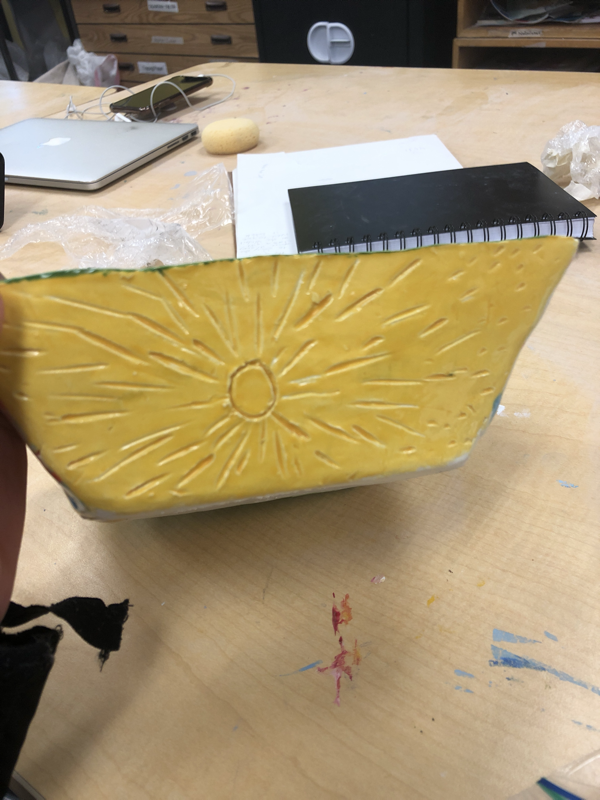
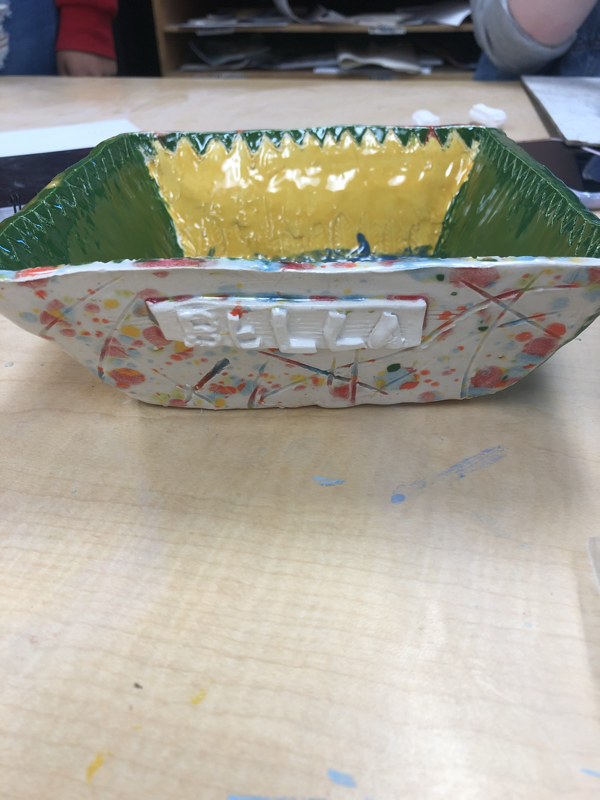
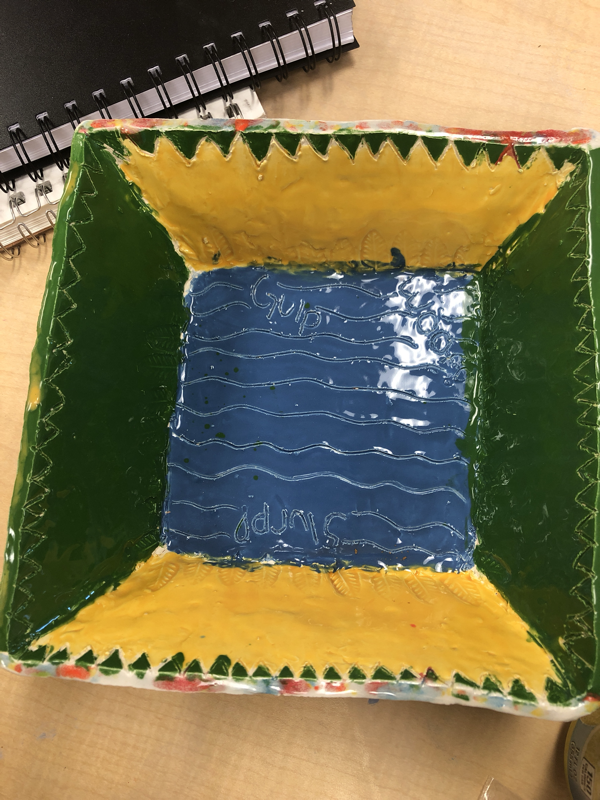
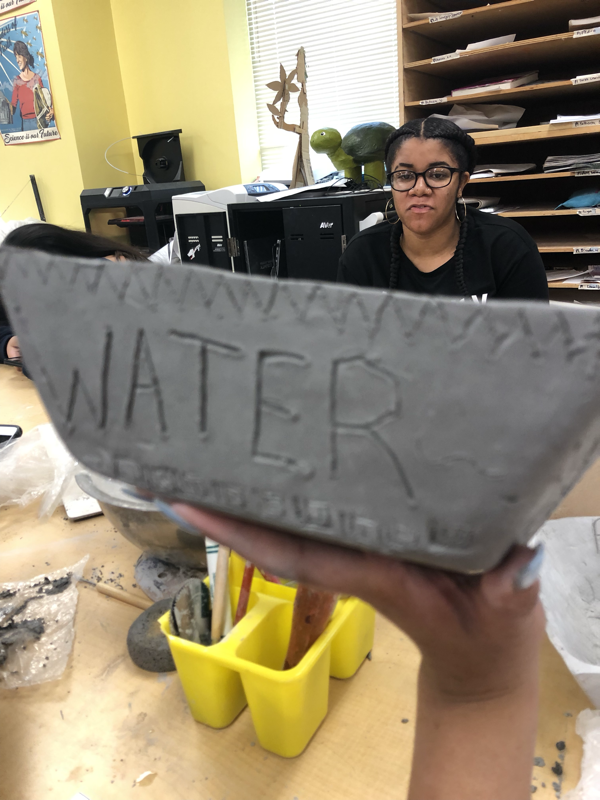

my tray set is for my dog Bella.. The designs I put on the bowls help you see which one is for food or water
I came up with the idea because i was wanted to make something based around my dog.
I got a bowl shaped like what you see above, I got a giant clay slab and placed it into the container that had plastic rap rapped around it. I then smoothed it out, let it sit over night, took it out of the mold the next day and started to design it. fired it, glazed it and wala.
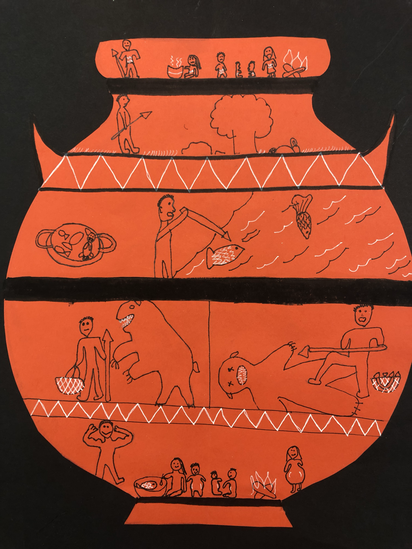
greek Pottery Paper Story Blog
|
|
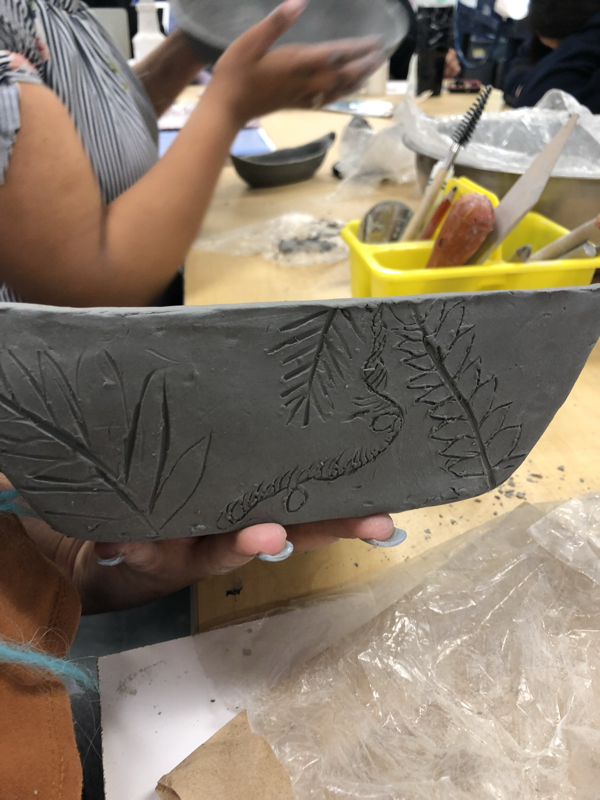
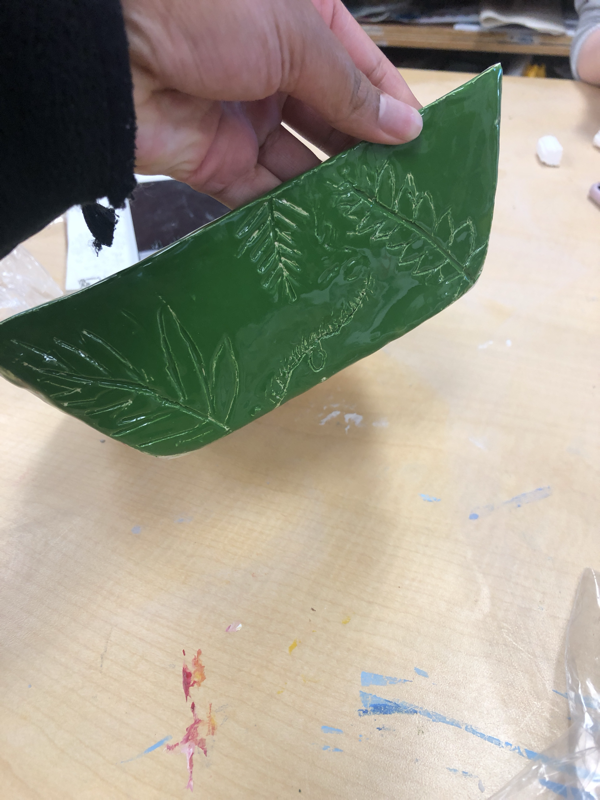
In progress sgraffito
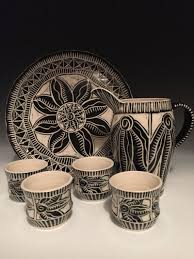

in progress |
Finished blog Post |
|
No questions
|
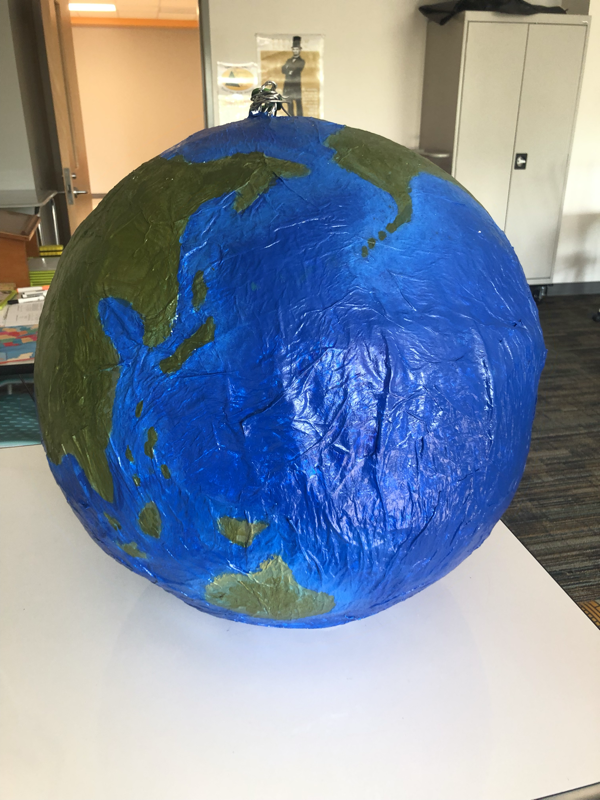
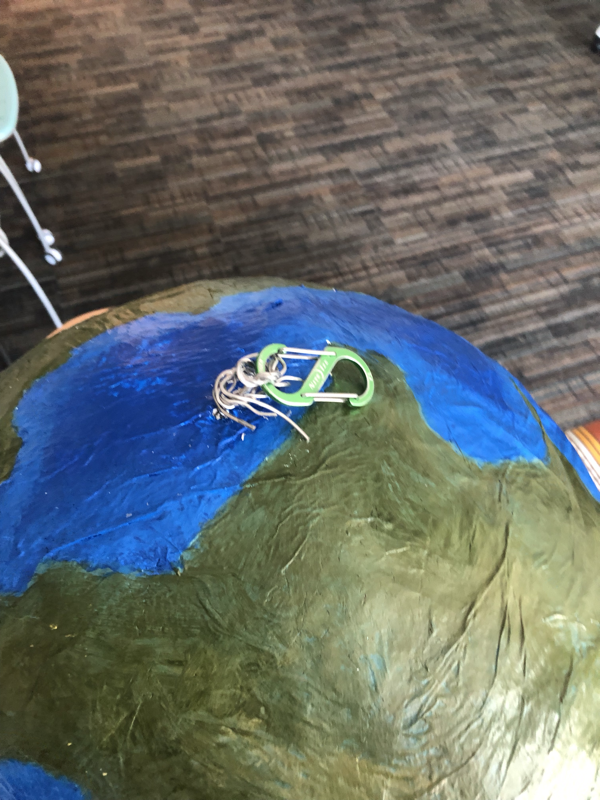
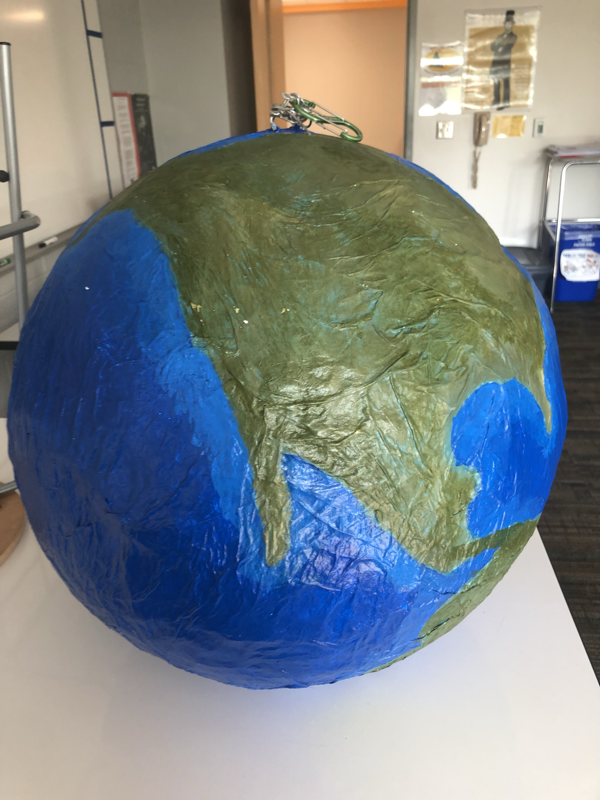
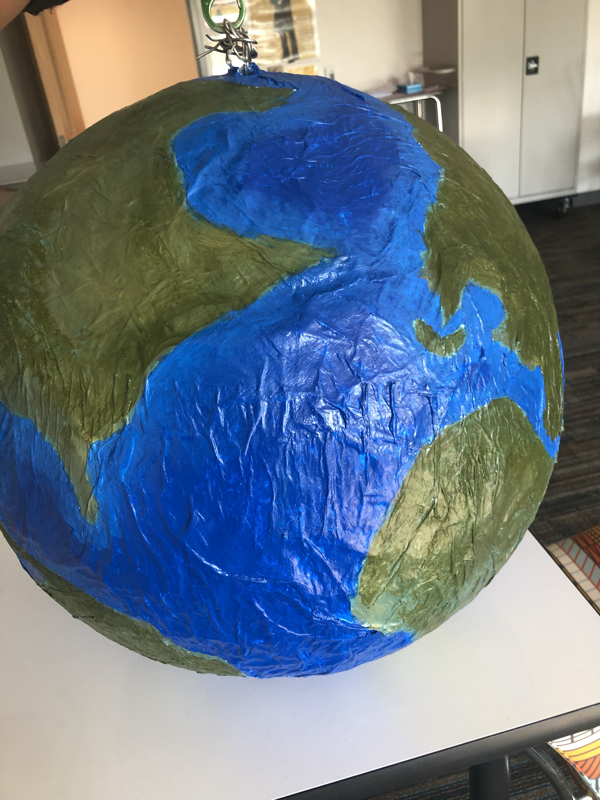
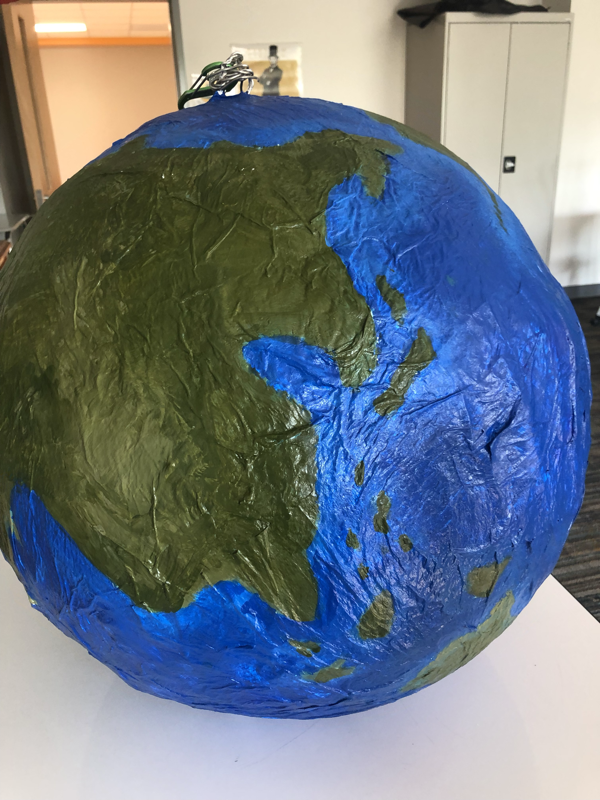
Art Show installation


- pros
- the shape actually turned out fine
- the continents are mostly accurate
- the water line that has light blue really makes the continent stand out
- where we hung it at the show made it seem as if it was floating
- Cons
- we maybe could have made the ball out of something else
- we could have also made everything a little more proportional
- Process
- we got a yoga ball paper macheed it until we felt there were enough layers, we also made sure that the paper towels were wrinkled so that it looked like texture for the globe. we then added paint and a hole for the top
Final Exam
What type of tools have you used? how did they help your work along? explain their function and purpose
Some tools I used this semester that were very helpful were the ribbon tool, the wooden rib and the needle tool. These tools were a lot of help when I was doing detailed work, or when I wanted to make something neater.
The ribbon tool is used to trim bases of pots and to hollow out shapes and sculptural forms.
The wooden rib is used to smooth out the clay.
The needle tool is used to cut, pierce, score, and finishing fine detail
How has your knowledge and understanding of tools changed since the beginning of the semester? Talk about your growth of understanding
My knowledge of tools has gotten better since the beginning of the semester because I learned about all of the tools and their uses. After using them, i learned when the best time to use them is ( how firm the clay should be), how much pressure to apply to get different uses out of them, and how to use some tools in place of others, or to pair them together to make designs look better.
|
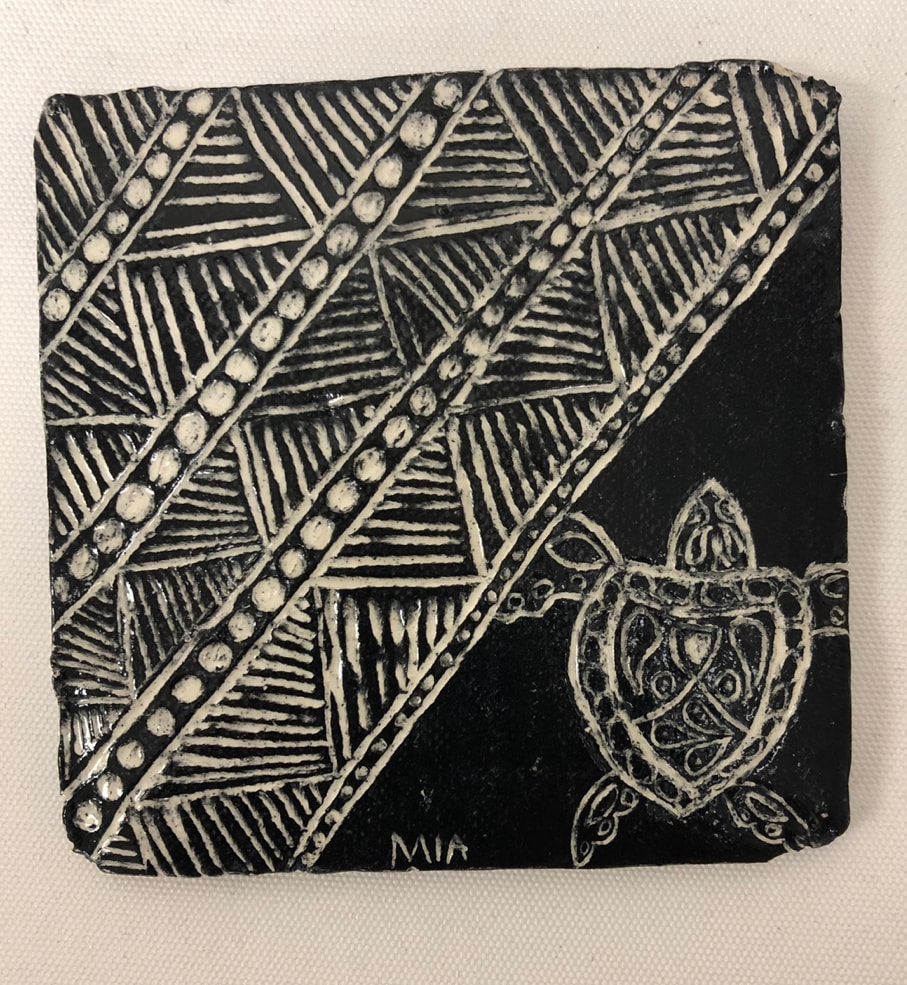
which project was your most successful? describe the theme and topic and the process to complete he project
my most successful project was the sgrafitto tiles. The theme was mostly personal, but we had to have registers. To complete this we cut the clay into a square put the black glaze, waited a night, and carved out our design. It was then fired and glazed and fired again. I really love the detail and time I put into this one. If I did it again I would make the lines clearer and more visible |
|
|
Least successful project, why you consider it unsuccessful. If you create it over what changes would you make
My least successful project was the paper mache project. I consider it unsuccessful because the shape isn't accurate, I didn't plan the nose out well, and the eyes don't match. I also would have changed the main shape of the head. if i recreate this i would make a better base, sketch out the accent colors a little better, and plan the nose out well. |

|
what was your favorite material that you used this year? why do you like working with it?
my favorite material was clay. I like working with it because it's easy to mold, but also the challenge to get the shape you want. I also like the process of the whole thing, shape, dry, kiln, gloss, kiln. i also like the surprise of the crackle glazes when they come out the kiln. |
